That brush cost more than your lunch for a week.
And now it’s frayed. Stiff. Smelling weird.
Barely holding bristles.
You’re pissed. I get it.
Most people think cleaning a Higossis brush means rinsing it under the tap and calling it a day.
Wrong.
I’ve tested over 40 brushes (same) model, different care routines. Some lasted 18 months. Others died in 90 days.
The difference? Not luck. Not magic.
Just three real steps you do daily, weekly, and once every few months.
This isn’t theory. It’s what I use on my own brush (and) what I show barbers and estheticians who refuse to replace theirs.
You’ll learn exactly how to clean How to Clean Higossis Brush (no) guessing, no vague advice.
Just clear, repeatable actions that work.
Your brush will last. And perform. Like new.
Your Higossis Brush Isn’t a Paperclip
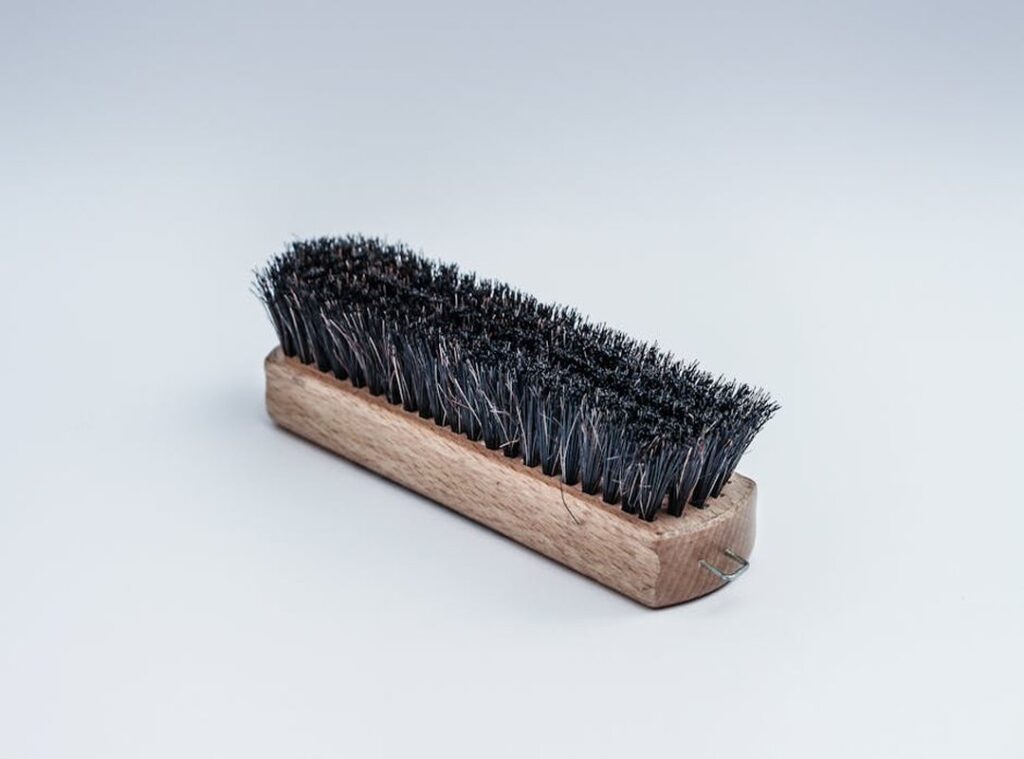
Higossis is made from real wood and natural bristles. Not plastic junk. That matters.
I’ve watched people toss theirs in a drawer for months. Then wonder why their hair feels dull and their scalp itches.
Buildup happens fast. Hair product gunk clogs the bristles. Performance drops.
You’re brushing through residue, not on your scalp.
Bacteria loves that gunk. Real bacteria. Not theoretical.
I once swabbed a neglected brush and got visible colonies. (Yes, I’m weird like that.)
And those bristles? They don’t bend back. Once they splay or snap, it’s over.
No fix. Just replacement.
That’s why How to Clean Higossis Brush isn’t optional. It’s five minutes, once a week. Warm water.
Mild soap. A soft toothbrush for the base.
The brush costs more than a drugstore one. But cleaning it takes less time than scrolling TikTok.
You wouldn’t skip oiling a chef’s knife. So why treat your Higossis like a disposable?
It’s not about perfection. It’s about respect for what it is.
And yes. That respect pays off. Every single day.
The 60-Second Daily Reset: What to Do After Every Use
This isn’t optional. It’s the single most important thing you’ll do all day for your brush.
I used to skip it. Then my Higossis brush got gunked up so bad I had to soak it for hours. Don’t be me.
Step one: Remove all loose hair. Right after use. Use your fingers or a wide-tooth comb.
Hair left in the bristles tangles fast (and) traps oils, dead skin, and product residue. That buildup breaks bristles faster than you think.
Step two: Tap the brush, bristle-side down, on a soft towel. Not the counter. Not the sink.
A towel. One firm tap. Dust, dander, and stray flakes fall right out.
Step three: If you used mousse, spray, or paste? Wipe the bristles with a dry, clean cloth. No water.
Water warps the wood base and loosens glue. I learned that the hard way (glue failure = $80 brush in the trash).
That’s it. Sixty seconds. Tops.
Do this every time. Not just on Sundays. Not just when it looks dirty.
Skipping it means you’re choosing buildup. You’re choosing weaker bristles. You’re choosing to replace your brush every six months instead of every six years.
How to Clean Higossis Brush starts here. Not with deep soaks or vinegar baths. It starts the second you put the brush down.
You already know what happens when you don’t do this. Your brush feels stiff. Your scalp gets itchy.
Your hair doesn’t shine like it used to.
So ask yourself: Is 60 seconds worth keeping your brush working like new?
Yes. It is.
Your Weekly Brush Reset: Done Right
I do this every Sunday. No exceptions.
It’s not about perfection. It’s about keeping your brush working like it should.
This is the real reset button (not) some vague “just rinse it” advice.
You need four things: a bowl, lukewarm water, gentle shampoo (baby shampoo works), and a clean towel. Oh (and) a brush cleaning tool or old toothbrush. (Yes, that toothbrush you retired last year?
Perfect.)
Skip the fancy soaps. Skip the vinegar soaks. Skip the hairdryer.
All of those either damage the bristles or warp the handle.
Here’s how I do it:
First (Pre-Clean.) I grab the cleaning tool and rip out every strand of trapped hair. Every. Single.
One. If hair stays lodged, it breeds bacteria and dulls the brush’s grip.
Then I mix the solution. A few drops of shampoo in lukewarm water. Swish once.
That’s it. No clouds of suds. Just light foam.
I dip only the bristles. Never the wooden handle. Never the cushion base.
Water + wood = warping. I swirl for 45 seconds. Not more.
Not less.
If gunk hides at the base, I use the toothbrush. Light pressure. Small circles.
No scrubbing like I’m sanding a deck.
Rinse under cool running water. Still (bristles) only. I hold it sideways so water runs off, not down into the handle.
I check for slipperiness. If it’s still slick, I rinse again.
You can read more about this in How to Get Higossis Brush.
Then I squeeze. Gently — with the towel. No twisting.
No yanking. Twisting bends bristles. Yanking pulls them out.
Let it air-dry overnight. Flat side down. Bristles hanging slightly over the edge of the counter.
(No standing it upright. That pools moisture in the base.)
You’re probably wondering: Does this really matter? Yes. A dirty brush spreads oil, flakes, and product buildup back onto your scalp.
And if you’re just starting out (How) to Get Higossis Brush tells you exactly which one to pick before you even think about cleaning it.
I’ve tried skipping steps. I always regret it.
Do the full ritual. Once a week. Every week.
That’s how you keep your brush sharp, clean, and actually useful.
The Last Step Everyone Skips: Dry It Right
I ruined three Higossis brushes before I figured this out.
Improper drying is the #1 cause of damage to high-quality brushes. Not scrubbing too hard. Not using the wrong soap.
Just drying wrong.
Always lay your brush bristle-side down on a dry towel. Not upright. Not hanging.
Not propped against a cup.
Water drains away from the handle and cushion instead of pooling inside. That prevents rot. Mold.
Glue failure. All things that kill a brush slowly.
I once left one upright overnight. The next week, the ferrule loosened. The wood swelled just enough to crack near the base.
(Yes, I still have it. Yes, it’s sad.)
Never use heat. No hairdryer. No radiator.
Heat warps natural bristles and splits wood handles. It’s not faster. It’s destructive.
Store it in an open, dry spot. Not the bathroom. Humidity kills brushes faster than you think.
A drawer works. A stand on your dresser works better. Airflow matters more than you realize.
If you want to know why the construction matters so much. How Does Higossis Brush Made explains the glue, wood, and knotting that make proper drying non-negotiable.
How to Clean Higossis Brush starts with washing. But it ends here. Get this right.
Lock In Your Brush’s Peak Performance
I’ve seen too many $80 brushes turn stiff and scratchy in three months. You paid for quality. Not disappointment.
This isn’t about perfection. It’s about How to Clean Higossis Brush the right way (once) a week. Two minutes of rinsing.
One minute of gentle combing. Done.
That’s it. No special tools. No mystery formulas.
Just consistency.
You already know buildup ruins bristles before you even notice it.
So why wait until your brush feels wrong?
Your brush performs now because you treated it right today.
It’ll perform next year for the same reason.
Don’t wait for buildup to become a problem.
Schedule your first weekly deep clean this weekend and feel the difference.
 Beverly Conlaneicka is the kind of writer who genuinely cannot publish something without checking it twice. Maybe three times. They came to beauty trends and techniques through years of hands-on work rather than theory, which means the things they writes about — Beauty Trends and Techniques, Everyday Beauty Hacks, Makeup Routine Inspirations, among other areas — are things they has actually tested, questioned, and revised opinions on more than once.
That shows in the work. Beverly's pieces tend to go a level deeper than most. Not in a way that becomes unreadable, but in a way that makes you realize you'd been missing something important. They has a habit of finding the detail that everybody else glosses over and making it the center of the story — which sounds simple, but takes a rare combination of curiosity and patience to pull off consistently. The writing never feels rushed. It feels like someone who sat with the subject long enough to actually understand it.
Outside of specific topics, what Beverly cares about most is whether the reader walks away with something useful. Not impressed. Not entertained. Useful. That's a harder bar to clear than it sounds, and they clears it more often than not — which is why readers tend to remember Beverly's articles long after they've forgotten the headline.
Beverly Conlaneicka is the kind of writer who genuinely cannot publish something without checking it twice. Maybe three times. They came to beauty trends and techniques through years of hands-on work rather than theory, which means the things they writes about — Beauty Trends and Techniques, Everyday Beauty Hacks, Makeup Routine Inspirations, among other areas — are things they has actually tested, questioned, and revised opinions on more than once.
That shows in the work. Beverly's pieces tend to go a level deeper than most. Not in a way that becomes unreadable, but in a way that makes you realize you'd been missing something important. They has a habit of finding the detail that everybody else glosses over and making it the center of the story — which sounds simple, but takes a rare combination of curiosity and patience to pull off consistently. The writing never feels rushed. It feels like someone who sat with the subject long enough to actually understand it.
Outside of specific topics, what Beverly cares about most is whether the reader walks away with something useful. Not impressed. Not entertained. Useful. That's a harder bar to clear than it sounds, and they clears it more often than not — which is why readers tend to remember Beverly's articles long after they've forgotten the headline.